Image Map
Showing posts with label recipes. Show all posts

Tuesday, October 8, 2013

Crockpot Baked Potato Soup


Today, I'm excited to share this very easy and very delicious soup that is perfect for the "chilly" temps that are coming, or if you live in the plains, will warm you up after you dig out of 3 feet of snow.

It was a perfectly fall day here in Texas on Sunday, so we "celebrated" by wearing sweatshirts, and eating a yummy potato soup, which I promise you will love.  

Ingredients:

1 bag of frozen hash brown potatoes (cubed)
20 oz. (or so) of low-sodium chicken broth
1 block of neufchatel (could use cream cheese too, but I like to cut corners)
1 can of cream of chicken soup
6 or so strips of bacon, fried, dried and crumbled
1 tsp. cajun seasoning (Or be scientific like me and do a few shakes in)
3 green onions, chopped for garnish
Shredded cheddar cheese for garnish/stirring in to make it even better
Salt and pepper to taste

Directions:

1.  Get that crockpot out and put the hash browns, chicken broth, cream cheese, and cream of chicken soup in and give it a stir.  Add in the bacon crumbles and cajun seasoning and stir again.  Let is go on low for about 6 hours or so, stirring occasionally if you can.  If not, just stir it when you get home and let it go again for the cream cheese to blend in.  

2.  When it's ready, spoon into bowls and garnish with green onion and cheese, then stir in that goodness and enjoy!

Boom. Done.  So easy and delicious.  What's your go-to crock pot fall soup or recipe?


Tuesday, June 18, 2013

Fancy Cupcakes :: Raspberry with Lemon Curd

These cupcakes are guaranteed to impress your friends and family, but they so easy to make it's gross, and there are SO many variations you could make!


Ingredients:

Cupcakes
1 box of white cake mix + whatever the box says you need to make it
1 1/2 c. frozen and thawed or fresh raspberries (see variations below)

Lemon Curd
6 egg yolks
3/4 c. sugar
Juice of 5 large lemons (This can be adjusted along with the sugar for tartness)
Metal bowl & saucepan or double boiler

Directions:
1.  Prepare the cupcake batter as directed on the box.  You definitely want to use a white cake mix, the color of the berries is so pretty against the white.
2.  Rinse raspberries if using frozen.  
3.  Once the batter has been totally mixed, carefully fold in your raspberries.  You may see some color go into the batter, it's ok.  This happened on mine and I had no pink cupcakes!
4.  Bake as directed on the box.  
5.  Remove cupcakes from the oven and let them cool completely.  
6.  Once they are cooled, use a paring knife or an apple corer to remove a hole from the center of each cupcake, being careful not to go all the way through the bottom:


7.  Using a teaspoon, fill each hole with the lemon curd just to the top so that it's even with the rest of the cupcake.
8.  Frost as usual with the frosting of your choice!  I used a basic cream cheese frosting on mine and topped them with a strawberry. 

For the lemon curd
1.  Heat up about an inch of water to simmering/boiling in a saucepan that your metal bowl will fit in.
2.  Whisk yolks and sugar together in a metal bowl (it must. be. metal--you will be placing it over the saucepan with water to indirectly heat the yolks, sugar and lemon juice.)
3.  Add the lemon juice to your yolks and sugar and place metal bowl on top of sauce pan and get your whisking arm ready!
4.  Whisk/stir for about 8-10 minutes (depends on heat) or until curd begins to thicken and set.  
5.  Remove from heat, cover curd with saran wrap and place in fridge for later.


Variations:
Strawberries with lemon curd
Blueberries with lemon or orange curd
Mixed berries with lemon curd

These are such a perfect summer cupcake, I can't even tell you!  They taste sweet and dessert-like, but also refreshing and light at the same time. Enjoy! 


PS--Don't forget to come back on Thursday for a HUGE giveaway all about booze, beer, and wine!

Boozy Blogger Giveaway


Tuesday, June 4, 2013

Cooking Lighter :: Cheesy Chicken & Pepper Casserole

This is such a good recipe, and not to mention, a serving of it is only 357calories!

No lie, it's from Cooking Light Magazine, one of my true favorites even though we've only had it once now, I can see it becoming a part of our rotation quickly.

I searched high and low on the website for a link to this recipe, but couldn't find one!  It wasn't a featured recipe, but a part of a "swap" issue, where if you like "x" ingredient, then you'll love this dish-type article.

So, this one was, "if you love Velveeta..", ok so we don't love Velveeta, at all.  

And it actually freaks me out because it's so shelf-stable, but whatever, this is delicious, and can't be worse than any of the queso junk we ingest! Plus, at 357 cals for 1 1/2 cups, you can't go wrong (based on six servings).

Lots of veggies, brown rice and chicken makes this very filling.  Mine is adapted slightly because the original called for diced onions which we didn't have (bc of course i have to forget something at the store every time) so I used 3 types of peppers instead.

Ingredients list:

2 cups of cooked brown rice
1 red pepper, sliced
1 yellow pepper, sliced
1 green pepper, sliced
Olive oil, about 1 tablespoon
1 tablespoon flour
1 tablespoon ground cumin
3/4 c. low-sodium chicken broth
8 oz. of Velveeta Mexican queso or pepperjack (I got the queso b/c it's what the store had.)
About 1 1/2 cups of shredded chicken or diced, cooked chicken (We had leftover rotisserie chicken from my lunch chicken so we used that!)
2 oz. shredded cheese of choice

How to make it:

1.  Preheat oven to 375 degrees.  Make your brown rice however you prefer to prepare it-stove top/microwave, just so it's ready.
2.  In a skillet, heat the olive oil over medium-high heat.  I just used our Misto oil sprayer for this part.  Once the peppers are just slightly crunchy still, add in your flour, cumin, and chicken broth:


3.  Let this go with the broth for about a minute, and then add in your cubed Velveeta.  If you have a personal issue with processed cheese, take it up with Cooking Light please lol. Stir the cheese until the whole mixture is smooth.


5.  Take the pepper mixture off of the heat, and add in the chicken and brown rice, mixing it well.  Once you've mixed it, smooth the mixture evenly into a casserole dish of your choice.  The one below is from Ikea, I think it's about 10x6 or something.  Pretty small.

6.  Top with some cheese-we had some shredded Mexican cheese in the fridge so I added that on.  


7.  Cover with foil and bake for about 25 minutes or until the cheese on top is to your liking and the whole dish is hot! 


Enjoy it in your lap while still wearing your under armour workout gear! :) so tasty and reheats like a boss.

Linking with Taste of Tuesday!


Tuesday, May 7, 2013

Nom :: Bacon-Wrapped Jalapenos

Today, I'm sharing the recipe for these magical gems:


Ingredients:

  • 12 jalapenos (we fit exactly 24 halves in our 9x13 above)
  • 1-8 oz. package of cream cheese (I used neufchatel actually) (let this soften up on the counter so it's mixable)
  • 1 container of crumbled gorgonzola cheese (about 3/4 of a cup)
  • 12 slices of bacon, cut in half
  • Honey BBQ sauce (just a little, like 2 tablespoons)
How-To:
  1. Slice, un-seed and trim up the jalapenos.  You can leave in some seeds if you like them to stay spicy and hot!
  2. Mix the cream cheese and gorgonzola together in a bowl.  Begin filling the jalapenos with the mixture.  Bryan used a dip spreader for this step.
  3. Next, wrap each pepper in a half slice of bacon.  So basically open your package of bacon, and cut it right in half down the center so that you have a bunch of shorter slices.
  4. Place all of the bacon-wrapped peppers into your baking dish or on your tray (we used a dish w/ a lid because we had to take them in the car)
  5. Dab a bit of barbecue sauce on top of each pepper...just a little will do!  I used a little bamboo spreader thingy for this, but a pastry brush would work well too.
  6. We put these into our friend's toaster oven for about 15 minutes at 350, and then cranked them under the broiler for another 5 until the bacon was nice and crispy!

Six of us mowed these down in no time & we got rave reviews!  Plus, they are so easy.  Enjoy everyone!


:: Linking up ::

    Just Because


Tuesday, April 30, 2013

Nom :: Banaynay/Paleo (?) Mug Cake!

Who doesn't love a mug cake?  If you haven't tried one, please do.  They are so good, and so easy and hit the spot when you're like, "damn, I want a warm dessert right now".  The only thing that annoys me is that most of the recipes I see call for 3-4 tbl. of flour, sugar, and require a lot of measuring.  I have nothing wrong with flour and sugar-we have tons of it in Oxo containers and all over the place, but basically I'm really impatient and too damn lazy to be hauling all of that out for a mug cake, which should be simple.

So I scoured the interwebs, which means I searched "mug cake" on Pinterest, and found a recipe for a Paleo Mug Cake.  I don't know a lot about the paleo diet, but I knew enough to know that this means "no flour".

world's worst picture of a mug cake, ever.
Here is your link to the original recipe, found at The Wannabe Chef.

So here's what it called for:

1 small banana (ripe, so it's mashable)
1 egg (you could get away with egg whites too probably)
1 1/2 tbl. of almond butter or any nut butter (ok I had peanut butter, so cool--I keep meaning to buy almond butter and then forget)
2 tbl. cocoa powder
Sweetener (optional--I used a packet of Truvia since I keep that around for my coffee)

Any add-ins you would like-chocolate chips (k, now is this paleo? no, i'm sure there is tons of refined sugar.), nuts, etc. whatever

Instructions:

1.  Mash up that NAYNAY (you guys know I love the naynays) in your mug! (Also, use a larger mug if you have one, not that cutesy little one that's good for taking artsy pics.)
2.  Add in your egg, nut butter, and mix that up well.
3.  Then add the cocoa powder and your sweetener if you're using it, as well as the add-ins.   I did put a few chocolate chips in, but it was honestly unnecessary.
4.  Microwave that bad boy for about 2 1/2 minutes.  Mine was set up nicely in the middle after that time, but this could vary.

Umm...the next step is fairly obvious, but go back to your couch, put on your Real Housewives, and eat a mug of delicious, warm chocolate cake.

Readers:  Can anyone confirm/disprove the paleo-ness of this mug cake?  I have no idea if I made it un-paleo by adding my peanut butter vs. almond butter.  I know the sweetener isn't ideal of course, but I do think it added just enough sweetness and is worth it!  

Linking up all over the place!


Thursday, April 25, 2013

Nom :: Chicken Gyros

I found this recipe a LONG time ago on pinterest (of course), and we always said we wanted to make it, and naturally, we just never did.  Reallyyyy regretting that right now because these are delish. 

There are two components to the meal--well three because we had a salad--you have the chicken which you marinate and the tzatziki sauce made with greek yogurt.  

The recipe originates here at "The Girl Who Ate Everything", with her post linking back to Annie's Eats.

Here's your ingredients list:

Tzatziki sauce:
1 cup plain Greek yogurt 
1 regular cucumber, peeled and seeded
1 teaspoon minced garlic
1 teaspoon white wine vinegar (We didn't have this! So I used red wine vinegar)
Salt and pepper
Squeeze of fresh lemon juice (I used about a teaspoon)
Extra virgin olive oil (just a drizzle on top)

For the chicken:
2 teaspoons minced garlic
Juice of 1 lemon (2-3 Tablespoons)
2 teaspoons red wine vinegar
2 Tablespoons extra virgin olive oil
2 heaping Tablespoons plain Greek yogurt
1 Tablespoon dried oregano
Salt and pepper
1 1/4 lbs. boneless, skinless chicken breasts

To eat:
Pita bread (we actually used flatbreads)
Tomato, diced
Red onion, sliced or chopped, however you prefer
Shredded lettuce

Instructions

Shred the cucumber or chop in food processor. I put the slices of cucumber into my Cuisinart Smart Stick which has a chopping attachment.  
everyone should have one of these smart stick hand blenders with all of the attachments! 
My cuc was pretty pureed by the time I was done with it--sorry for the blurry photo
Mix together the yogurt, shredded cucumber, garlic, white wine vinegar, salt and pepper to taste, and lemon juice. Drizzle lightly with olive oil.

Refrigerate for at least 30 minutes before serving to allow the flavors to meld.

For the chicken marinade, combine the garlic, lemon juice, red wine vinegar, olive oil, yogurt, oregano, and salt and pepper to taste in a medium bowl. Whisk together until mixed well. Add the chicken pieces to the bowl and mix well to coat.  Cover and refrigerate for about 1 hour.  Note:  We pre-sliced our chicken up into "gyro" sized pieces so that the marinade would really soak into each piece.  The original I read said to just put the whole chicken breast in and then slice/cut it up afterwards. 

Cook the chicken as desired--we just put ours into a saute pan on the stove and let it go until it was done.   There were a lot of juices from the marinade, so let those stay in to keep flavor but drain them off before creating your gyro!
yummm
While the chicken is cooking, preheat your oven to warm up those pitas, and get your tzatziki out of the fridge.

 Final product:
his
hers

So I'm not really a a big "sauce" person--I hate mayo, ranch dressing, and most other creamy-based sauces, and therefore I did not use any of my homemade, hard-worked tzatziki!  But B had it and loved it.  I drizzled a little Greek dressing on top of my pita for some extra flavor and added lettuce!  We ate these with big Greek salads on the side and had them again for leftovers-they were just as great as the first time, huge win in my book.

Tuesday, April 16, 2013

Nom :: Skinny Chocolate Chip Banaynay Bread

So, I lied when I recapped my weekend. 

I also made this perfect chocolate chip banana (banaynay) bread.  

And yes, banaynay is real thing--in college, a few of us were extras in a commercial at Wrigley Field.  And one of the guys took a banana from the kraft table at lunch and carried it around all. day. and it got so disgusting.  And somewhere in there, "the naynay" began.  We all took pics with it, etc.  Ok, anyways, the recipe.

The recipe comes from Skinny Mom, and of course, I found it on Pinterest:

a lot of times, i screenshot pins i want to try so they're in my album and stay fresh on my mind! try it!

I followed the recipe exactly, with one change-up.  The recipe calls to make it in two loaf pans.  I had every intention of doing this, but when I poured the batter in, it wasn't very high-and maybe that's part of what keeps it low-cal.  Because the slices don't look very high in the photo.....?? Mystery to be solved.

But anyways, I put it all in one, and baked it at 330 (which is the recommended temp.) for about 50 minutes.  For the last 25 minutes, I covered it with foil to prevent over-browning.  Mine still browned a little more than in her photo (hence why I have no good photo of mine!) but it is delicious nonetheless!

This is honestly the best banana bread I've ever made, including ones with full eggs, oil, and regular flour.  This recipe really sold me on subbing in applesauce--others I've tried have turned out dry, and this bread is rich, dense, and tastes like it has 0 shortcuts in it!


Tuesday, April 2, 2013

Nom :: Cashew Chicken

And today, the recipe for cashew chicken.  Like I said yesterday, this is a pinterest recipe--and it comes from the blog of MommaChelle.  When I wrote it down, I must have auto-adapted it slightly, so what you'll read here is a slightly adapted version.

Ingredients:
2 chicken breasts (we had a little under a pound)
2 tbl. low-sodium soy sauce (really, use low-sodium.  there is a lot of soy in this recipe and it would definitely be salty if you used regular)
1/4 c. oil.  (I used more like 2 tbl. and a few spritzes from my Misto sprayer)
1 tsp. red pepper flakes (or to taste)
3 green onions diced (I used the top, more green parts, and I just cut about 1/4 down on the whole bunch)
2 cloves of garlic (we both agreed 3 would maybe be tastier)
1/2 tsp. sesame seeds
1/2 c. cashews, unsalted or lightly salted

Sauce:
4 tbl. low-sodium soy
1 1/2 tbl. cornstarch
4 tsp. sugar
2 tsp. white vinegar

Steps:

1.  Cut chicken into small pieces and toss in the 2 tbl. of soy in a small bowl.  Let it marinade a bit while prepping other ingredients.

2.  Whisk the sauce ingredients together and slice up green onions if you haven't done so yet.  Heat your oil in a wok and add tin the red pepper flakes and garlic.  Saute for about 1 minute and then add in the chicken.

3.  Cook the chicken until it is just done, and then add the cashews and remove it from the heat.  Then pour in the sauce mixture and coat the chicken and cashews.  Finish by sprinkling sesame seeds and green onions on top. Enjoy over rice, quinoa or whatever you choose!

the sauce thickened a little more after this 


Monday, March 11, 2013

Nom :: Pepper Steak

image via


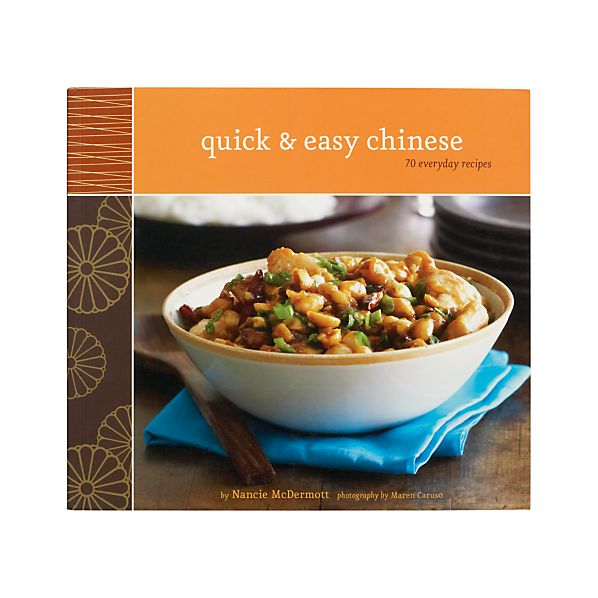
We received this cookbook at one of my bridal showers-it was one I registered us for at Crate and Barrel, and they still have it!  You can find it here.  We have made several recipes out of this book, and most have been hits!

Last week, the hubstigation made the Pepper Steak recipe from the book---it was delicious!


Ingredients:
1 tblspn dry sherry or rice wine (we used rice wine)
1 tblspn water
2 tsp cornstarch
1/2 lb. thinly sliced beef (we used about 3/4 lb. or a little over of flank steak)
2 tblspn soy sauce (we always use low-sodium soy)
1 tblspn chicken broth or water
1 tsp dark soy or molasses (we didn't have either and just added a little extra regular soy in)
1 tsp salt
1/2 tsp sugar
1/2 tsp freshly ground pepper
3 tblspn vegetable oil
1 tblspn chopped garlic
2 tsp chopped fresh ginger (we didn't have this, so we just left it out!)
2 cups thinly sliced green bell pepper strips (we used a green pepper, red pepper, and yellow pepper)

Instructions:
  1. Combine the sherry/rice wine, water, and cornstarch and stir to dissolve cornstarch.  Add beef & toss to cover evenly.  Set aside.
  2. Combine soy sauce, chicken broth, dark soy, salt, sugar, and pepper, and mix.  
  3. Add one tablespoon of oil to a large skillet/wok and then add the garlic and ginger.
  4. Add in peppers to the skillet and let them cook until they just begin to soften, then remove back into a bowl.
  5. Add more oil, if needed, and then add your beef in. Let it cook until it's no longer pink, and then add the peppers back in.  
  6. Add the soy sauce/broth/salt/sugar mix and toss the beef and peppers in it until it is coated. Peppers should be tender but not limp, and the beef should be cooked through when you pull it off to serve.  
  7. Time to nomnomnom!  We ate this over half a cup of brown rice in a bowl and it was perfect!
our version

Friday, October 26, 2012

Cajun Chicken Pasta

This is one of those recipes that I love, love, love.  I found it, as usual, on Pinterest, via Skinnytaste.  The recipe can be found here.

It has SO much flavor, the veggies add a lot of good, crunch and texture, and it tastes so good.  It also has the husband's stamp of approval which is big for me when I'm trying to eat healthy meals, but make sure he enjoys it too--typically he just eats twice as much as I do, so it works well!

Here is how my version looked:

nom nom nom
I used bowtie pasta to make it since we had some leftover...and I thought it looked really cute, plus made it easy to eat!  The best part is not only that it tastes delicious, but once you have the ingredients chopped and prepped, it comes together so easily.

Sunday, October 21, 2012

Banana Chocolate Chip Oatmeal Cookies

I got a couple of comments about  the cookies from my post looked, and wanted to share the recipe!


The recipe can be found here at the Six Sisters' Stuff blog, which is where I discovered it on Pinterest!

A few notes/thoughts on these:


  • I only used about 1 cup of chocolate chips...it was what I had on hand, and I still think they're great!  Just had to make sure a few made it into each scoop
  • I used 1 cup of oats, but for some reason, my cookies do not have the same "look" that the photo shows on Pinterest. I would probably add more next time for extra texture--maybe 1 1/2 cups, see how the batter looks and go up from there, etc.
  • I had to use about 1 1/2 medium/small-ish bananas to get to half a cup, great banana taste, but not too overbearing!
  • I *did* use unsalted butter, as the recipe calls for, so that wasn't what changed the look/crisp of them, but either way, they taste great and I love them!  It was a great way to use up the leftover bananas from this week.
  • If you added in walnuts, these would be even better!